Sunday, February 6, 2011

New and very much improved! :)

Hi All - 

Eat Something New has moved over here to wordpress.

Just like in Atlantic City a few weeks ago, I got a free upgrade. Check out the new look and separate pages for restaurant reviews, recipes, remakes, and product reviews.

I'm loving it and hope you do too!

[[My favorite posts and the most popular posts and recipes have been moved over there with me, so don't fret! :) ]]

Wednesday, February 2, 2011

Tenderloin Tuesday?! Crazy Coincidence!

So last night it was my turn to cook dinner for a few of the girls here at school, and I had seen a video online that explained how to make a garlic and herb crust for a pork tenderloin, so that was the plan. Afterward, I  (naturally) jumped on Twitter to post about the new recipes I tried, just to find out that it was Tenderloin Tuesday!? I had no idea - certainly one of the craziest coincidences I have run in to lately!

A few weeks ago I was perusing my favorite food sites and came across a video that showed how to make a garlic and herb crust for a pork tenderloin. Being that I know how to make things like chicken cordon bleu, thai peanut chicken lettuce wraps and green smoothies, but have no idea how to make more basic dishes such as pot roast, I thought this would be a great basic to add to my repertoire.

At the store, however, I could not find a whole pork tenderloin (and there's no butcher you can talk to)  so I went with the thin cut pork loin chops. I thought it would be fine, but looking in my Good Housekeeping Cookbook as well as over 20 other recipes in other various cookbooks and websites, I realized that this was not going to be easy. Why? Apparently pork, like chicken, is very, very tricky because it is hard to make sure that it cooks through, but isn't dry or tough. And it, also apparently, is even more difficult than chicken.

I didn't decide on any particular recipe. Instead I used the same seasonings as the video I watched, and combined what everyone else said as far as cooking time and method, and decided to cook them on the stove, with oil, in a pan, and watched them VERY VERY carefully.


Here is the how I did it... 
(I cooked for 4 people, no leftovers - that's a good sign, right?)

First I marinated the pork loin for 3 hours (overnight would be even better)
- 8 thin-sliced pork loin chops.
- 4 cloves fresh garlic, peeled & minced
- 1 cup. Balsamic Vinegar
I placed the pork in a single layer in a Pyrex dish. I made sure both sides of each piece was coated in the balsamic vinegar. Then I sprinkled the garlic evenly over each piece.

Then I started on the Sweet Potato Fries

- 3 large sweet potatoes
- Olive oil
- Fresh cracked pepper
- Fresh cracked sea salt
- Sugar Free Lite Maple Syrup
- Cinnamon mixed with Splenda (equal parts)

Preheat the oven to 450 degrees. Leave the baking sheet in the oven so that it preheats as well.

Clean, peel and then cut the sweet potatoes in to long strips. (Tip: be careful not to leave any of the ends or edges too thin or pointy, because they will burn).

I coated half of the fries in to olive oil and placed them one side of the baking sheet, then topped with fresh cracked pepper and sea salt.

The other half I coated with maple syrup and sprinkled with cinnamon and Splenda. Sweet and salty!

I made an aluminum foil barrier to place between the two types so that the oil and syrup didn't mix.

Place in the oven and cook until they look brown and cripsy at least on one side. Flip with tongs occassionally.

Now it's time to cook the pork. 

This step is last since it is SO quick! I used a stove-top griddle pan. Basically it is just a very shallow fry pan. My only large fry pan is a wok, which would not work for this, so this was my best option.

First preheat your pan or griddle with some EVOO. While you are waiting for that to preheat, mix the following incredients on a plate or in a shallow bowl:
- Rubbed sage (about 1 T.)
- Dried Rosemary (about 1/2 T.)
- Garlic powder (1 t.)

Next, carefully remove one pork loin chop at a time from the dish where it was marinating. Using tongs place the chop garlic-side down (careful that it doesn't all fall off!) in to this mixture to create an "herb crust."

Once they all have crust on them, one at a time, again with tongs, place them in to the hot oil on the pan or griddle. After about a minute (will vary depending on how thick your chops are), flip, being careful again not to lose the crust.

They should cook for about 2 minutes on each side. Or until cooked through, but not tough. (Note: pork will continue to cook after you remove it from the heat, so the second they look almost done, remove them and place them on a platter.

I also made a big salad with a new homemade dressing, packet gravy, and balsamic reduction

I rinsed and chopped up some romaine lettuce, letting it sit out while I did the rest of the cooking. One thing I've learned about salads at home, I HATE when they are ice cold. Then I chopped up some tomatoes, red onion and cucumbers, putting each in to their own small bowl. Feta and almonds rounded out the toppings. Not knowing how much of each  my guests would like, I left them out and let them do the topping to their own individual liking.

The dressing was an adaptiation of one I saw on the back of a lettuce bag at the store. I used:

- 1 cup Fage 0% Fat Greek Yogurt (any plain yogurt would work)
- 1 T. Agave Blue Nectar (you can use honey)
- 1/2 t. Poppyseeds (in the seasoning aisle- keep searching, they're there!)
- Juice of 1/2 Lemon

Mixed it up and it tasted great over the aforementioned ingredients :)

The balsamic reduction could have it's own post. Potent smell, pain in the butt, the smoke detector went off a few times, but it tasted great! If you want to make your own, google it or search on Food Network.com, there are tons of methods out there - and if I had the right tools and a normal kitchen, it would have been fine! :)

The gravy I made in case my guests weren't keen on the whole balsamic reduction thang. I just used a packet from the store labled "Pork Gravy," mixed it with water and heated it up. (Bleh, if you ask me!)

Last, but certaintly not least, dessert!

I made a Chocolate Cinnamon Pudding. I bought a packed of No Sugar Added, Fat Free Jello Brand Instanty Chocolate Pudding Mix. I made it according to the package, but substituted milk with almond milk. The packed says that if made with soy milk, it would not set, but with almond milk it does! I mixed in 1 Tablesoon of ground cinnamon, cut up apples for dipping, and VOILA! :) It was a hit!

Note: when you first try to mix the cinnamon in to the pudding it is as hesitant as an 8th grade boy at the homecoming dance. Just keep trying and eventually they will mix :)


Overall I think it was a success!

I really like the herb and garlic crust mixed with the strong balsamic flavor. Pork isn't my favorite to begin with, but I'll be willing to try it again - hopefully as a whole loin rather than chops!

The salad was great and I'm glad that there is leftover dressing! (I had some for lunch today:))

The sweet potato fries were very tasty - both ways - but I prefer firmer, crispier fries. I used a little too much oil, which made them soggy and not too crispy. I would suggest tossing them with oil in a separate bowl or dish to coat, then transfering them to the baking sheet. I drizzled mine with oil and I think there was too much reside which led them to cook in a small pool of the oil.

This meal was INSANE preparation wise for me. I have a tiny little kitchen with very, very, very little counter space, and with 2 sauces, 1 meat, 5 salad toppings, a dressing, meat, and potatoes - it was a little too hectic. Here's to another "Pro" being added to the "Moving Home After Graduation" Pro/Con List :)
Huge mess in my tiny kitchen :)

Do you cook pork? What's your favorite way?
What about sweet potato fries?

Giveaways coming soon! And I am VERY excited! But I need to know what you guys would like! What kinds of things would you be interested in for giveaways? Food bars, kitchen gadgets, recipe books, seasonings/spices? Let me know! :)

Thursday, January 27, 2011

My Adventures with Quinoa & Skinny Shrimp Scampi

So as you know I recently tried quinoa for the first time. Similar to pasta and rice, it's fine on its own, but works better with a sauce or other ingredients mixed in with it. So this past week I messed around with different ideas getting inspiration from couscous recipes and other things I found on the glorious word wide web.

I have come to realize that I love homogeneous mixtures. Just in case, homogeneous means "consisting of parts all of the same kind" (the trusty mac dictionary). When talking about food, to me it means taking bites that are all similar - so all kinds of ingredients mixed up in to some kind of tasty goodness.

This came as a little bit of a shock to my awareness since as a kid I refused to allow any of my foods to touch. And I would eat one at a time, saving the best for last. AND I yell at my boyfriend from time to time for including more than one of each of my carefully crafted sides in one bite. But I have apparently been converted, because mixtures seem to be my thing now-a-days.

Here are some examples:

One morning I tried quinoa with scrambled eggs and tomato.

Non-stick spray
1 c. cooked quinoa
2 eggs
1/2 small tomato
Salt and pepper to taste

Once the pan is hot, add the cooked quina, leaving an open circle in the center of the pan.
Crack eggs in to the opening and break yolk with your spatula.
Add tomatos around the edges.
Once the eggs start to firm up, use the spatula to scramble and mix ingredients.
In the pan before plating.
All broken up in my homogeneous mixture!


Room-temp quinoa salad with tomatoes, cucumbers, red onion, red wine vinegar, and hummus
This was good, but too much red onion. Here is a modified recipe from what I used that I think would be better:

1 c. cooked Quinoa
1/2 c. cucumbers
1/4 c. tomatoes
1/8 c. red onion
2 T. hummus (I used Marketside Roasted Garlic - my new fave hummus!)
1 t. red wine vinegar

Mix ingredients, let them sit to reach room temperature, and enjoy! :)


so many fresh flavors :)
Quinoa with meatballs and tomato sauce
1 c. cooked quinoa
2 homemade meat balls (mom's! :) )
1/2 c. tomato sauce
1 t. parmesan cheese

Heat ingredients (except for the cheese) separately until they reach desired temperature, then mix, top with parmesan and enjoy! :)

Quinoa with tomato sauce is probably my favorite way to eat it so far (although I really did enjoy all of these combinations!) This is a great way to enjoy an old favorite for anyone who is gluten-free! Plus it would be easy to make both quinoa and pasta and allow your guests to choose.

before mxing..

tastes way better than it looks, promise!

Frozen, pre-cooked under warm water to defrost
Finally, the "Skinny Shrimp Scampi"
I'm calling it "Skinny" because I got the recipe from Bethenny Frankel's site (creator of the Skinny Girl Margarita)  I changed it up just a little, so here it goes...

Ingredients:
  • About 12 large pre-cooked shrimp
  • 2 1/2 T. BestLife buttery spread
  • 1/2 c. white wine (Charles Shaw Sauvignon Blanc)
  • 1 t. red pepper flakes
  • 2 garlic cloves, peeled and chopped
  • 3/4 lemon juice
  • 1/2 lemon zest
  • 1 c. cooked quinoa
The Process:
- First I ran the frozen, pre-cooked shrimp under warm water to defrost them. (frozen bag of 3-4 servings of 12 is only $5 at Walmart!)

- In a medium sized sauce pan I added the buttery spread, wine, red pepper,  lemon juice and garlic, and brought to a boil.

- Meanwhile, I attempt to get some lemon zest from my lemon... without a zester. I've been talking about kitchen gadgets and this is next on my list! Although not impossible, zesting is difficult without a zester, for sure. To zest without a zester you need to use a veggie peeler or a knife to get some of the skin off, but none of the white parts (If you look int he picture I got a littttttle bit of white in there) The pieces you cut should be yellow on both sides, at least for the most part, and then cut in to tiny pieces. I'm working on my knife skills so here's a tip: keep the nose of the knife down and just move the handle up and down and from left to right to cut the zest.
Before chopping the zest in to tiny pieces


- This is also a good time to heat the quinoa (I used a microwave for about 35 seconds) and plate it, making a nice bed for your shrimp and sauce.

- Once the sauce came to a boil I reduced it to simmer and added the shrimp. It's very, very important that you do not over-cook shrimp - they are GROSS when they're overcooked, trust me... I did it once, the first time I ever cooked for one of my close friends here at grad school - I'm surprised she let me cook for her after that!

- After 1-2 minutes the shirmp should be warm, so remove the pan from the heat.

- Because I wanted a pretty presentation for my picture, I decided to remove the shrimp with tongs, place them where I wanted them on the bed of quinoa, and then pour the sauce over last. That's probably the easiest, least messy, least dangerous (the sauce is HOT!) way to do it - so I recommend it.

- Top with lemon zest (and parmesan if you wish; I didn't) and that's it! I couldn't believe just how easy it was and how quickly I was able to do it! Especially for the first time! (TWHS). It only took about 30 minutes start to finish! (Keep in mind the quinoa was already cooked).

Serving Suggestion: I would suggest serving this with a nice, big, fresh salad and either garlic bread or a simply toasted Italian or French bread for dipping :)

Substitutions: This recipe can be adapted very, very easily for all different tastes and some dietary concerns! Shrimp could be swapped for veggies or chicken, and quinoa could be switched for pasta if you're not a fan. You could also try olive oil over buttery spread if you're avoiding dairy. :)

So, being the lover of homogeneous mixtures that I am, despite how pretty this plate looks now, I totally mangled it later on. First I cut off each tail and ate the shrimp meat inside of them. Next I cut the remaining shrimp in to pieces and mixed it all together. This is the moment when I realized I really love to mix things up!  But I guess that's the whole point here, right? Mixing things up - trying new things :)

I can not wait to make this for guests who love seafood, and especially my newly gluten-free friend, my boyfriend and my mom. I'll probably use pasta when I make it for them (quinoa for myself and my GF friend) but I think they'll love it! There's no heavy cream, the buttery spread is better for you than butter, and therefore there isn't much fat and so many less calories than the restaurant version! And TRUST ME, you don't miss them! The fresh garlic, fresh lemon, spicy cracked pepper, mmmm!  Truly delectable!

I'm loving quinoa! But I'm going to take a break from it for awhile I think - a little over-kill this week! But I'm so glad I experimented with it in so many ways, because next time I make a batch (one of the things I have to think about, living alone) I will have so many delicious options for how to use it up!


What's your favorite way to eat quinoa?
Any good tricks/tips/articles/blog posts you know of for knife training? :)

Tuesday, January 25, 2011

Broccoli Redemption & Quinoa's Premier

 
Quinoa, Roasted Broccoli & Baked Flounder
Yes, I am STILL talking about Broccoli! :)

After that whole personal veggie ziti debacle, I decided it was time to figure out a new way to cook this frozen broccoli, because I sure as heck wasn't going to waste it, but I also wasn't going to eat it the way I had been either.

So I got to thinking and remembered that I had heard several times over the past few weeks about roasted vegetables over at TheNewHealthy. But wait, what exactly does "roasting" mean? I know roasted meat is made in the oven, but what's the difference between roasting and baking?

According to the wonderful-for-familiarization-purposes website, Wikipedia, "roasting is a cooking method that uses dry heat, whether an open flame, oven, or other heat source. Roasting usually causes caramelization or Maillard browning of the surface of the food, which is considered a flavor enhancement," (Wikipedia, "Roasting"). OK, now I get it... except how is that different from baking? The jury is still out on the exact answer to that one, but if you're curious it mostly has to do with air circulation, you can read more here.

So now I wanted a specific recipe, so I googled "roasted broccoli" and one of the first search results was a link to a recipe posted by The Amateur Gourmet. The original recipe, as he notes, is Ina Gartin, most commonly known as The Barefoot Contessa, you can find her recipe here. The Barefoot Contessa calls is "Parmesan-Roasted Broccoli" and The Amateur Gourmet calls it "The Best Broccoli of Your Life," and I'll have to agree with the latter.

Here is what the recipe generally calls for and what I wound up using:
  • Broccoli (I used frozen - florets & stems)
  • Olive oil
  • Garlic cloves
  • Salt (I used sea salt)
  • Black pepper
  • Lemon zest (No lemons in the house)
  • Freshly squeeze lemon juice (I used lime juice from one of those plastic limes)
  • Toasted pine nuts (skipped it)
  • Freshly grated parmesan cheese (I used grated)
  • Julienned fresh basil (I used dried)
So after reading Amateur Gourmet's account of just how delicious this broccoli was, and knowing I had most of the ingredients in the house, I decided to try it out! I thought about what else I had in the house and remembered that I had a box of quinoa that I had really been wanting to try. Plus I have frozen flounder fillets; a balanced meal, so I was ready to go!

The process:

- Preheat the oven to 425 degrees.

Drying over a paper towel.
- Place frozen broccoli in a bowl, almost covered with water, and microwave for a few minutes to steam.

- Once slightly cooled, scoop broccoli out of the water with your hands, placing the broccoli in a paper towel-lined strainer. (It's important that the broccoli is completely dry before roasting)

- Cover a baking sheet, or any baking dish for that matter, with aluminum foil, and transfer over the broccoli.

Just before roasting.
- Drizzle broccoli with olive oil and sprinkle with sea salt and black pepper.

- Peel and slice desired number of garlic cloves (I used 1 since it was just me) and add to the baking sheet.

- Roast for 20-25 minutes (or until there are some brown spots on most of the pieces of broccoli)


- Now you add the lemon juice and lemon zest (or lime juice for me), a little more olive oil, basil, and the parmesan. (I did this step in a small bowl so that it was easier to toss).
See the caramelization?! Mmm :)

I thought that not having the lemon would have ruined it, but it didn't; although next time I will use a real lemon for the zest and juice just to get the full effect. I was also skeptical of the "brown" they both said to look for, but it didn't taste burnt or charred at all; it's just that caramelization. It truly does enhance the flavor.

This broccoli was phenomenal! I can not believe that I can now make frozen broccoli at home and feel confident serving it to guests. It was tender, yet firm and not at all rubbery or watery like when I added it to the ziti. (I bet if I roasted the veggies, that ziti would be a whole lot better!)

So the flounder was nothing special, just a little olive oil, rosemary and garlic powder; honestly just not worth writing about. But the quinoa (pronounced keen-wa) on the other hand, was a hit!

Quinoa is a grain that can act like rice or pasta, and is popular in gluten-free recipes. It has a light texture similar to couscous but with a nuttier taste. I prepared it just the way the box said to (it will vary based on brands) and it was like cooking rice or pasta.

A little taste-testing :)
Since I've never had it before I decided to put a little bit in to three small condiment bowls. In one I added tomato sauce, another olive oil and the third some Olivo Light "butter spread" to see how it tasted each way. The tomato sauce was my favorite and I plan to eat it with mom's homemade meatballs that I have in the freezer either this week or next.

Cooked Quinoa
I decided to throw it in the bowl where I tossed the broccoli and added a little bit more of the olive oil, parmesan, black pepper and sea salt, mixed it up, and voila! It was great. I will say though, that I wound up mixing it with the broccoli while eating it, and am looking forward to trying recipes where other ingredients are mixed in with it.


I URGE you to try this roasted broccoli recipe! And I'll be posting in the near future about my experiences with different quinoa recipes for you to try!

What's your favorite way to eat qunioa? What's your favorite roasted vegetable recipe?

 
Another favorite tool of the trade that makes certain tedious tasks easier: My silicon bristle brush. Makes spreading certain things SO much easier - like olive oil on flounder... or garlic bread!

Monday, January 24, 2011

Ziti is just NOT my thing!

Until this past summer when I started trying to buy vegetables on a budget and in bulk for a single person, I never really ate frozen broccoli, at least not knowingly. Over the summer I had some friends over, made breaded flounder, jasmine rice, and frozen broccoli. These are all ingredients I had on hand since the dinner party grew from 3-5 about 30 minutes before it was time to start cooking.

I steamed the broccoli and didn't really think much of it. It was fine. The next day when the same crew was out to dinner, one of my friends mentioned that he doesn't eat frozen broccoli, but did the night before just to be polite. There must be a difference, I thought, because this particular friend doesn't seem too particular. I haven't really thought about since then, until last night.

Ingredients before mixing.
I the spirit of trying something new, having some ingredients to use up and a need to redeem myself, I decided to try a personal veggie ziti. I had some pre-cooked whole wheat penne, ricotta, crushed tomatoes and spinach in the fridge, so I figured why not?

I made ziti for friends a week or so ago and totally forgot the aluminum foil over the top so it came out with a hard (yet not inedible) cheese shell. Bleh. No one mentioned it, (god, I have polite friends; who knows if they think anything I make is good!) but I knew I had goofed. Too much chatting and too much savignon blanc, I think. (Also burnt the garlic bread, which I've never done. STILL not used to my mini oven I guess!).

Mixed plus seasoning, before mozzarella & not baked yet.
ANYWAY, that is why I wanted a little redemption. So I made a personal ziti by simply mixing the whole wheat penne, low fat ricotta, crushed tomatoes, steamed from frozen broccoli, steamed from fresh spinach, and what I thought were roasted red peppers. I topped it with garlic powder, Italian seasoning and mozzarella. I covered it with foil, and baked it on 400 for about 15 minutes.

It looked great, everything was the proper temperature, and there was no cheese shell. So I thought I had at least redeemed myself. First bite: pasta is good; cheese, tomatoes, spinach, and especially the seasoning, all good. Second bite: Nope. The peppers tasted funny, so while looking for the expiration date I noticed that the jar read "sweet red peppers" - whoops! Definitely different than roasted red peppers! So I took all of the peppers out (luckily I cut them in to pretty big strips), and tried to salvage my meal. Still not so great. Again, just fine.
After baking. At least it looked good!?

The broccoli was too crunchy! That was my biggest issue. I was hoping for a homogeneous mixture of pasta, cheese, crushed red tomatoes, soft broccoli, and spinach but the broccoli, particularly the stems, stood out. They didn't mix well with the other ingredients, and they. were. watery!

Watery-ness, this is what I think the issue with frozen broccoli is - it just tastes watery. Bleh.

So it was basically another, although edible, flop.

Ziti is just not my thing, apparently. I think if I tried to make it again, it would all be fine considering I figured out what worked and what didn't - but I'll probably say away from it for awhile. I need a break from it and plus it's pretty boring compared to quinoa ... hint, hint ;)

Roasted Red Peppers.. my new favorite pizza topping!

So I was feeling a little lazy Saturday night, sitting on the couch watching some tv and messing around on the Internet. I finally got hungry and just didn't feel like spending too much time in the kitchen (which rarely happens!), but I didn't want to sacrifice taste, or nutrients! So looked around in the cabinet and refrigerator, and took out a bag of frozen broccoli. That's when I saw the Boboli pizza crust!

A few months ago a Food and Beverage PR company in NYC sent me some vouchers to pick up some of the products they've been working on promoting for their clients. A few of the vouchers were for Boboli products, which at that time I had never tried. I used the vouchers on a package each of 8" mini white and 8" mini whole wheat pizza crusts. SUCH a good decision!

Whole wheat crust, mozzarella, red bell pepper, black olives
Shortly after  redeeming my vouchers I noticed that the crusts should be used within a few days of purchase, unless they're frozen. So I made one the night I got back to school from holiday break and froze the rest.

One (of the several) great things about having these crusts on hand is that you can use up whatever you have in the cabinet and refrigerator. My mom sent me back with a few fresh ingredients we didn't use over the holidays, so I cut up a red bell pepper and used about 1/3 of it. Then I found some leftover large black olives and cut about 10 of those in half. I grabbed some jarred pasta sauce I had on hand and spread it over the crust, then added shredded mozzarella cheese and my veggies. I did as the directions indicated, and placed the crust right on the rack in the oven at 450 degrees for about 12 minutes.

I love pizza. All kinds. I was skeptical of this crust, but it was great! It was soft on the inside, but not rubbery, and cripsy on the outside without being a threat to my tooth enamel. The best part, for me at least, was that it was whole wheat and DIDN'T taste like cardboard! I have definitely jumped on the whole-wheat band wagon over the past few years, but I have yet to find a whole wheat pizza that I really like, so this was exciting! It was so quick and easy, I was glad to have them on hand.

Whole wheat crust, roasted red peppers, mozzarella, spinach, ricotta
Well, back to this Saturday night, like I said, I was feeling a little lazy, but didn't want to sacrifice taste or nutrients. So after finding the crusts, I made another pizza. Again it was whole wheat; there are 2 in each package of the mini crusts. But this time I wanted to mix it up topping-wise. I had some fresh spinach on hand, some leftover crushed tomatoes from making chili, shredded part-skim mozzarella, a little low fat ricotta and what I have been referring to as the never ending jar of roasted red peppers.

First I spread the crushed tomatoes over the crust. Wasn't sure how this would wind up tasting, but until just now I had forgotten that I used crushed tomatoes rather than sauce, so it was a perfectly acceptable substitute.

Next I sprinkled the part-skim mozzarella over the crushed tomatoes, followed by about 10 spinach leaves, about 1/3 cup roasted red peppers, and four small dollops of ricotta cheese.

Piping hot and deeeeelicious!
It baked for about 12 minutes until the cheese was melted and the crust crispy. After taking the first bite I realized that I never had roasted red peppers as a topping before, because there's no way I could forget this taste. I'm a huge fan of roasted red peppers, and I'm the newest fan of them as a pizza topping. The flavor is so strong and delicious, plus the spinach, crispy crust and gooey cheese. SO GOOD!

It honestly was delicious. My mouth is watering ask we speak.

Also, as I mentioned, the first pizza I made with a fresh, not frozen crust. The second pizza I made using a frozen crust (I didn't thaw it out, either) - and they both tasted the same. I was worried about the frozen crust, but you never would have known!

Yes, those vouchers were given to me by a PR company, but there would be no reason or benefit to myself if I lied to you. If 30 of you then went and tried the crusts and hated them, then came back here and wrote a comment saying so, it wouldn't help me, or anyone. Some of you may not be huge fans, but I will tell you, truthfully, that I am a fan of the Boboli whole wheat pizza crusts, and I suggest trying them out!

At the very least, do yourself a favor and try pizza with roasted red peppers - if you like them to begin with - I promise you will not be disappointed!

New pizza cutter - makes things a whole lot easier


Having the right tools of the trade make the task a whole lot less tricky (I really love alliteration) - I will be posting in the near future about my favorite kitchen tools! I've become quite the gadget collector and I want to share a few of my favorites! :)

Do you have a favorite tool or gadget in the kitchen? I'd love to hear about them if you do!

I'm also thinking about doing a giveaway soon with one of my favorite tools - so stay tuned!

Thursday, January 13, 2011

BLT meets Grilled Cheese

What to make for lunch, hmmmm... I kinda feel like grilled cheese, but I kinda want to make a BLT with those Hormel Real Bacon Pieces. Why can't I have both?! These were my thoughts yesterday afternoon as I peered in to my refrigerator looking for something lunch worthy. And I decided that I can have both, why not?


I consider myself a healthy eater. Not a health nut by any means, but a healthy eater. I get more than the required servings of fruits and vegetables daily, I vary my vegetables, make at least half of my grains whole, and get enough calcium, iron and protein based on my activity level. To me, calling myself a healthy eater means that I try to make healthy choices that I know my body needs, without disregarding everything that my taste buds want. I still eat pizza and burgers and ice cream. I just eat them less often, in smaller portions, go for the lower fat and lower sugar options, and try to add on any fruits and veggies when I can. Tomato Pie (no cheese) with muchrooms and garlic powder and Pinkberry with blackberries, coconut and raspberries are two of my favorite "healthy splurges." I also eat taco bell from time to time. (Health nuts, I know you're cringing). It's my biggest guilty pleasure. As much as I would love a cheesy gordita crunch, I usually get fresco tacos, their "healthier" options. Gotta live a little. But I want to live a lot, and for a long time, so most of the time I try to make healthy choices. Plus, I LOVE healthy foods! :)

Enough about me, and what does this have to do with my grilled cheese BLT? Well, neither of those things are particularly good for you, but I tried to make it as healthy as I could.

Yes, I measured! :)

The Players:
  • 2 slices Arnold 100% whole grain bread (toasted) (at least half your grains should be whole)
  • 1 slice Sargento reduced fat provolone cheese   (-- I swear you won't taste the difference!)
  • 3/4 tablespoon of Hormel Real Bacon Pieces (yes, I measured!) (REAL and less fatty than bacon bits or freshly cooked bacon)
  • 1/2 of one medium sized tomato or 1 whole Roma tomato
  • 1 leaf of Romaine lettuce (Iceberg if you prefer, but there's less nutrients!)
  • 1 tablespoon Light Mayonnaise (Helmann's really is the best)
The Game:

Spread 1/2 T. mayo on one side of 1 slice of bread. After the bread is covered to the edge, use knife to remove any excess. Place bread slice mayo-side-down in a preheated pan. It's an old family secret that no matter how healthy I get, I am not willing to give up. Of course I use Light and/or Olive Oil Mayo to make it a little better, and I use less than we used to at home, but still. The taste is just a little bit different, but I absolutely love it. Grilled cheese just isn't the same without it for me.

Place provolone slice on dry side of the slice of bread in the pan.

Sprinkle barely 1 T. of bacon pieces over the provolone cheese. You may be thinking BACON?! and she considers herself at all HEALTHY?! Yep, bacon and healthy can be in the same sentences, believe it or not. Freshly cooked bacon is greasier and fattier, and bacon bits aren't even bacon, so this is a great option at only 25 calories per serving.

Slice tomato and cover to the edges of the cheese slice.

Spread the other 1/2 T. of mayo on one side of the other piece of bread. Place on top of the tomato mayo-side-up.

From here, cook like you would any other grilled cheese- flip when the bottom piece is golden, and remove from heat when the top piece is golden, too.

When finished, place the sandwhich with the cheese side down on a plate. Pull the top piece of bread off, add the lettuce, and return the piece of bread.

Cut diagonally. I don't really have an explanation, but I like it  better this way.

There you have it! Grilled cheese BLT.
I also had an orange, three strawberries and about 16 oz. of water. (See, healthy choices!).


Give it a try. Or mix two of your favorite sandwiches together keeping in mind which ingredients you think would go well together (I wouldn't suggest PB&J and Salami). And let me know how it goes!

Tuesday, January 11, 2011

One Pan Pasta Primavera. This is how I know.

My Take on 1 Pan Pasta Primavera


So today was Totally New Tuesday (hmm maybe I'll make this a weekly thing)! I had a "green smoothie" for breakfast (see blog post before this one), a turkey/provolone/pear/balsamic lettuce wrap for lunch, and I just got done with my take on pasta primavera for dinner. This blog post could not wait. Not only did I absolutely LOVE dinner, I realized that I finally had a pretty complete answer to the question my friends always pose to me: "How do you know how to make all this stuff?" But first, let's talk about the primavera.


Having already made two new concoctions today and having spent lots of money last night at the grocery store, it was time to check out the fridge. I decided that for dinner I had to try to use up as many fresh ingredients as possible, namely the ones that may go bad over the next few days since my meals are pretty much already planned out.

I poked around a bit and instantly tons of thoughts started going through my head: ricotta, mozzarella, pasta; pasta, spinach, tomato; spinach, feta, tomato, olives. Then I saw it: the zucchini. My mom had given me a small package of baby zucchini and a package of baby corns (think Chinese food) and I had yet to use them. I reached for the zucchini, grabbed the baby corns, took a handful of baby carrots and put them on the counter.

Hmm. The baby corns made it a little difficult since they don't really go with... that's when I remembered the bag of pre-cooked whole wheat penne. I pulled it out. Although corn and pasta means double starch, I decided I could just use less pasta. Pasta Primavera is one of my restaurant favorites.

But wait, I've never made it before. Nor have I seen it being made. Or heard how it's made. Or read a recipe on how to make it. Well, what do I remember? That's when it came to me: one of the ways that I know how to cook, or at least how to mix ingredients, has to do with my approach to food and my keen sense of observation.

I eat food slowly (most of the time) and thoughtfully (usually). I like to savor each bite and think about the flavors. Not to a degree where it's noticeable; I don't sit and contemplate the meaning of every bite, or what every single spice or seasoning could be. I just like to enjoy food rather than rush through it. It's an experience :). Observing how things look/taste/smell when I prepare them compared to the way that prepared food in restaurants look/taste/smell allows me to draw conclusions on how to achieve desired outcomes in the kitchen. This is how I know what flavors tend to go well together.

Then I noticed the pork tenderloin in the fridge. Hmm.. I should freeze that. So I called my mom, just to double-check whether or not I could throw it in the freezer the way the store packaged it or whether I should toss it in to a freezer bag. THIS is the other way I know how to cook: my mom. I know I am biased, but I love the way she cooks. And although our diets consist of almost completely different ingredients, I learned all of the basics from her. I've always watched my mom, two of my grandmothers and my aunt in the kitchen, but being around my mom the most, I learned the most from her. To this day I still call her every now and then to ask a question about time, temperature, etc.

Veggies before the peppers were added.
OK, back to the Pasta. So I realize that I'm not positive how to make Pasta Primavera but decide to just wing it. Why not?! I'm cooking for myself tonight so if it's a total flop, oh well! So I put a little olive oil in my grill pan and add cut strips of the zucchini, baby corns, baby carrots, and by this point I had decided to throw in the 1/3 of a red bell pepper I found in the fridge.

I toss them occasionally with tongs, then it hits me (again): the third way I know how to cook is my own research on the subject, mostly via the wonderful world wide web. I take the 3 steps out of my kitchen and in to my office/dining room and type "Pasta Primavera" in to Google. Thousands of search results come up, but I click on Giada De Laurentiis' recipe, having seen her show a few times on The Food Network and trusting that it's probably great yet simple. I was right.

Now I've added the pasta.
Wouldn't ya know! Carrots, Zucchini, Red bell pepper! Salt!  Pepper! Olive oil! Great! So far on the right track! I scroll quickly through the rest of the ingredients she lists and her instructions and decide that this will be good. Once the veggies are tender I add a little more olive oil, then the pasta followed by 3 heaping teaspoon fulls of parmesan cheese, maybe about 2 tablespoons of garlic powder, 2 tablespoons of italian seasoning, a little more sea salt and fresh cracked pepper. I toss with the tongs until the pasta is warm and all of the veggies and pasta are somewhat evenly coated with the cheese and seasonings.

I plate half of it and put the other half in to a tupperware container for tomorrow. I sit down on my couch and take a bite, thinking it will be good. WRONG: it was FABULOUS! I think that the word fabulous has a little bit of a joke-type connotation, but it works here. It was absolutely delicious. My thoughts went to a few people I know who I think would love it and how I can't wait to make it for them. I actually impressed myself.

And now the cheese and seasonings!
This dish is so full of flavor, several different textures, so many smells and tons of nutrients with all of the different vegetables! Because I didn't over do it with the cheese and the seasonings the vegetables have a chance to shine on their own. Meanwhile, the penne grabs the cheese and the seasonings for a garlicy, cheesy, strong flavor. My favorite bite was a piece of pasta, zucchini, red pepper and baby corn. The carrots are great too, though! I just snuck a single penne noodle from the container of leftovers and I think the red pepper is the star. It's flavor is so strong and delicious it is carried by all of the other ingredients. The baby corns were way better than I thought they were going to be. Sweet, crunchy and since I cut them in to similar shapes as the pasta, they played a similar part. Can't wait for leftovers! :)

Because I know you don't need my inner monologue when making this for yourself, here's the recipe in short form:

You will need:
  • Pasta, whatever kind you'd like (I used whole wheat penne)
  • Zucchini
  • Baby corns
  • Red bell pepper
  • Carrots (baby or regular, peeled and cut)
  • Olive oil
  • Parmesan cheese
  • Garlic powder 
  • Pepper (I used fresh cracked black pepper)
  • Salt (I used fresh cracked sea salt)

How to:
  • My pasta was pre-cooked, so you'll want to start by making the pasta, draining and setting aside.
  • In a grill pan (any pan will work) put about 1 tablespoon of olive oil and heat on medium. (Don't let the oil get too hot throughout this process since you don't want to fry the ingredients)
  • Cut zucchini, carrots, corn and pepper in to pieces - any shape and size you desire. Add to the pan. Sprinkle with salt and pepper. Toss with tongs until tender.
  • Add pasta and about 2 tablespoons of olive oil and toss with tongs.
  • Add garlic powder, italian seasoning, parmesan cheese and salt and pepper.
  • Toss with tongs until coated evenly. Add more oil if it's too sticky and not mixing.
One big downfall I am trying to work on is measuring. I don't really measure anything. I just wing it, taste it, and go from there. Sorry if this makes things difficult when replicating recipes. If you want more specifics, e-mail me at brichter@udel.edu and I'll try to give more specific approximations.

My first ever "Green" Smoothie!

So with the birth of this blog I've started regularly following a bunch of other great blogs, mostly about healthy eating, food in general and healthy living (see: greenlitebiteshealthychicksthenewhealthy and lifeafterbagels).

This week a few of these blogs (thenewhealthy & greenlitebites) talked about green smoothies! Yes, that's right, green! For those of you who are smoothie fans, whether you get them from your favorite juice bar, kiosk in the mall, or your very own kitchen, I'm not sure how many of you are really familiar with green smoothies. I definitely wasn't before this week.

I make smoothies at home a lot, and they're always purple. I tend to use a good amount of raspberries and/or blueberries and/or blackberries which, no matter what else I add, tend to color the whole thing a vibrant purple color. Until the other day.

I had picked up a package of Market Pantry frozen mixed fruit from Target in the spirit of trying something new, and the smoothie was... light yellow. I was intrigued, as the few grapes and strawberries didn't seem to do much to the color. But that was it, just slightly intrigued. Until yesterday.

It was the third time I had seen green smoothies in a blog post just this week, so it was official, I was going to try it! But before I get to that - what makes the smoothie green? Well, the answer is spinach. Yes, spinach. In a smoothie. And, get this, it isn't horrible. In fact I loved it. Believe it or not, (and Mom, if you're reading this, I know, I know, just trust me..) it really doesn't taste like spinach.. at all! Ugh, I can't... nor do I want.. to imagine what it would taste like if it did! I love spinach, but I can't imagine loving it cold. With ice. And yogurt. Threw a straw.

So in my big venture to the grocery store last night I picked up a bag of fresh spinach so I could try this out. This morning for breakfast I decided it was time. Keeping in mind the recipes that my fellow bloggers posted and tweaking them based on what I already had here, this is what I came up with...
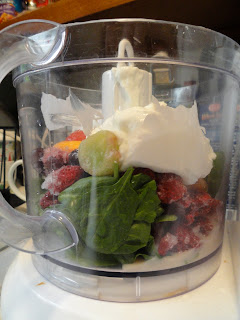
I chose my food processor over a blender

  • 1 handful of fresh spinach leaves
  • 2/3 c. frozen raspberries
  • 2/3 c. frozen mixed fruit
  • 1/3 c. + 1 tblspn plain greek yogurt
  • 1/3 c. Almond milk (add more if it's too thick)
Any fruit you like will work, and any yogurt and any milk (or even water or iced tea!) will do just fine. You have to make it your own, use what you have and go with your gut ;). Check those other blogs I mentioned above to see what combination they went with.

Be sure to blend on high. Usually I don't have to but in this case, to really blend the spinach, I had to blend on high for about 30 seconds. 


As soon as I hit the "pulse" button the smoothie almost instantaneously becomes the color that it is going to remain throughout the rest of the blending process. This time it turned, you guessed it, purple! Wait what? I thought this was a post about a green smoothie? Well, yes it is. The whole concept is that there is a healthy handful of spinach packing iron, fiber and lots of other wonderful nutrients. So what if my first green smoothie wasn't green; the concept is still the same!


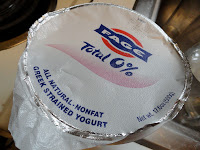
How did it taste? It tasted very similar to all of the other smoothies I've made. This time I used not only spinach, but greek yogurt rather than regular plain yogurt. This was due to my recent discovery (on Thintervention, the only 10 minutes of that show I've ever seen) that yogurt actually isn't nearly all it's cracked up to be, especially since it has SO many grams of sugar. I've been spending 10-15 minutes in the dairy aisle each trip to the store, analyzing the fat free plain yogurts on a mission to find the "best of the bunch". EatThisNotThat says that Stonyfield's is the best, but it was no where to be seen, so I went with Fage Total 0% Plain Greek Yogurt. I licked a little off my finger and the aftertaste was more of an after feeling. It was like my mouth was instantly dry and my tongue was a little too fond of the roof of my mouth. It tasted fine though, and the smoothie had NO aftertaste.. or feeling. I will definitely be buying Fage again in the future unless someone shows me a better yogurt! :)

I know that you're all wondering if you can do this since you just can't imagine spinach in a smoothie. I swear, at least with the combination I used, there was no spinach taste, smell, or aftertaste. I will do it again. Tomorrow morning. And the day after that.

I challenge you to try something new and make a smoothie from home. If you're already a smoothie pro, try Greek yogurt and/or spinach. So many places where you can buy pre-made smoothies use simple syrup (water and sugar), other heavy syrups or preservatives that make your smoothie not nearly as healthy as you may think. Making it at home ensures that you know what you're drinking, and adding the spinach has oh so many benefits! Let me know how it goes!

Friday, January 7, 2011

Pio Pio

My boyfriend recently started working in finance in NYC. The British company he works for is pretty lax, to say the least, affording him the time to take leisurely lunch breaks and sample the different fare available in the city. Some of his colleagues took him to a place called Pio Pio and he insisted that we go back together. So we did. And now I envy his proximity to the establishment everyday.

Pio Pio is a Peruvian restaurant group with six locations throughout Manhattan, Queens and the Bronx. They serve both lunch and dinner, but their specialty is rotisserie chicken, or pollos a la brasa. It didn't say on their website so I looked up the meaning of "pio pio" and supposedly it means "the weak cry of a young bird". Their logo is a bird too, so I guess that makes sense.

We went to the Hell's Kitchen location and it is a pretty big restaurant, but has a very modest entry way. If we weren't looking for the specific address, we never would have found it. Once we were led past the bar and down a flight of stairs we entered a room elegantly yet simply decorated. The lights were low (but not too low), the tables were nicely set and the wait staff was dressed in either black or white, head to toe. My favorite part was the stone work on the walls.

It was time to look over the menu. I am a firm believer in the idea that we should eat whatever the restaurant claims to be good at. I don't order pizza from Iron Hill Brewery or a Cheeseburger from Cucina Italia. I had always thought this way, but had never really articulated it. A really good friend of mine dates a chef, and after I heard him put it in to words, I knew it was the way to go. So that's that, "I'll have the pollos a la brasa." Had I ordered this way I would have received an entire chicken to myself. Good thing my boyfriend is an "insider" and knew what was up.

We ordered the lunch special. When we were there it wasn't listed on the menu. Definitely ask if you don't see it. I am convinced it is the best deal in all of NYC. For $8 you get a quarter rotisserie chicken, a side, avocado salad, and a non-alcoholic beverage.

It was a ton of food, and good thing because I had been traveling and was starving. Phil ordered the sides, again since he's a pro at Pio Pio. He picked Tostones for himself and Yuca Frita for me. The chicken was moist, perfectly seasoned and delicious! Chicken is tricky since there is a fine line between cooked and overcooked. The pollos a la brasa was done perfectly!
The shine you see on the vegetables is an indication of freshness. That's not the dressing!

I ate the avocado salad first. It was one of the best salads I have ever eaten in my life, no lie or exaggeration. Over a bed of iceberg lettuce there were several pieces of the freshest avocado, tomato, cucumber and a little radish. It had a little bit of a very light vinaigrette over top. Every mouthful was a collection of flavors from each of the fresh vegetables. Especially as someone who LOVES avocado, I couldn't get enough of the salad.

The Tostones weren't bad, but they weren't my favorite. Tostones are fried, green planatains, a traditional side in many Latin American meals. They were just bland for my taste, even with the sauce. I think I personally am just not a fan of plantains.

The Yuca Frita or Yuca fries (pictured right) were great! I hate to say they are similar to potato  fries because they are SO much better, but they are similar in that they are both tuber carbohydrates cut in to pieces and fried. What makes the yuca frita so much better is the texture. Potato fries are soft and mushy on the inside, while the yuca frita are much denser, able to be cut with a knife. They don't have a very strong taste, could be compared to potatoes, but the texture makes them much more enjoyable. Especially with the unbelievable sauce, which I'll get to later.


Everything was delicious on its own, but what really set it all off was the green sauce(s). There was a thinner green sauce (see above with the Yuca frita) that came with the meal, and a second sauce (see below) that's creamier and more vibrant in color that the professional asked for on the side. We couldn't get enough of either one. The thinner sauce looked like it was going to be oily, being that it was light in color, almost transparent, but it wasn't. It was spicy and strong in flavor, a mixture of different spices that worked perfectly on any of the accompaniments.


The other sauce I've been thinking about since we left. It is a creamy, but not very thick, spicy green sauce. I'm not sure of the ingredients but my guess is a plain yogurt similar to what's used in Mediterranean cooking with cilantro, garlic and perhaps green chilies. At least that's what it tasted like. I ate every last yuca frita just to be sure I got as much of the sauce as possible. It was the perfect savory sauce to dip each of more subtly flavored foods in to. Supposedly they bottle it. I will find out. I will buy a case.


Needless to say, we cleared our plates!
Pio Pio seems to be NYC's best kept secret, especially their lunch special. If you're ever in the area I strongly encourage you to type it in to your smartphone and find the nearest location. It was absolutely delicious. And although I love trying new things, I hope to return to Pio Pio several times, I'll just change up the sides for something new.